Hello everyone,
Christmas is right around the corner and many of us are still looking for Christmas card and project ideas. Well at the Inspired Stamps blog you will find a new idea each week, this week it is my turn to share a project tutorial. Today I created a "card in a box" using the Shepherd boy and the standing sheep stamp and laying sheep stamp. I stamped the sheep several times on cardstock and watercolored the images using distress markers. There are several different versions of this "card in a box" on the internet, but I like this one the best because you can get two out of one 8.5 X 11 inch piece of cardstock. You cut the 11 inch side in half, to get two pieces of 8.5 X 5.5 inches.
The box panel is folded and burnished on three sides. (You want to keep fourth side upright, this will be your back panel, this is also where the sides are attached with strong adhesive. Cut up three of the score lines to create flaps (this is the shorter of the panels).
The Z-fold strips are placed on the inside of the box. It is easiest to use a strip with fold facing back panel and line up with the back edge, adhere, then line up side and fold box on side and burnish. Repeat with strip toward the front of the box. These pieces are needed for the box to have stability and to allow you to attach your embellishments. I added pieces of BoBunny paper from the Christmas Collage collection. The pieces were cut to 2 X 2.25 inches, adhere to 3 side panels, the back panel was a bit longer.
I cut 1/4 inch strips to attach to back of my Shepherd and sheep to better attach them to the inside strips. I also added some grass to these strips, since sheep are grazers and it helped mask the white strips. I added Luke 2:11 to front flap and stars to back panel.
More BoBunny Christmas Collage paper was added to bottom panels.
The back of the box is where you can stamp your sentiment and write your personal message. My sentiment came from the Christmas verses set.
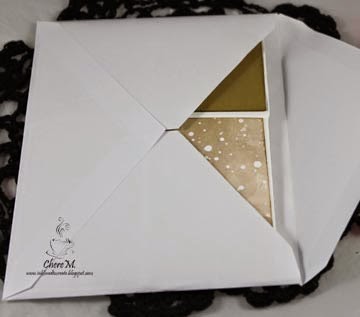
Here is the box folded flat. When you are adding your embellishements you want to make sure they will not stick out the sides when folded flat, so that the card will still fit in a standard A2 envelope. The card mails flat, but what a wonderful surprise for your recipient when the open up and see your creation. I just love how fun these cards are to make and how happy they make the recipient. I hope you enjoyed the tutorial and I hope you will give this card a try. If you have any questions, please let me know. Thank you so much for stopping by today and please be sure to check in often at the Inspired Stamps blog for more inspiration.


No comments:
Post a Comment